-
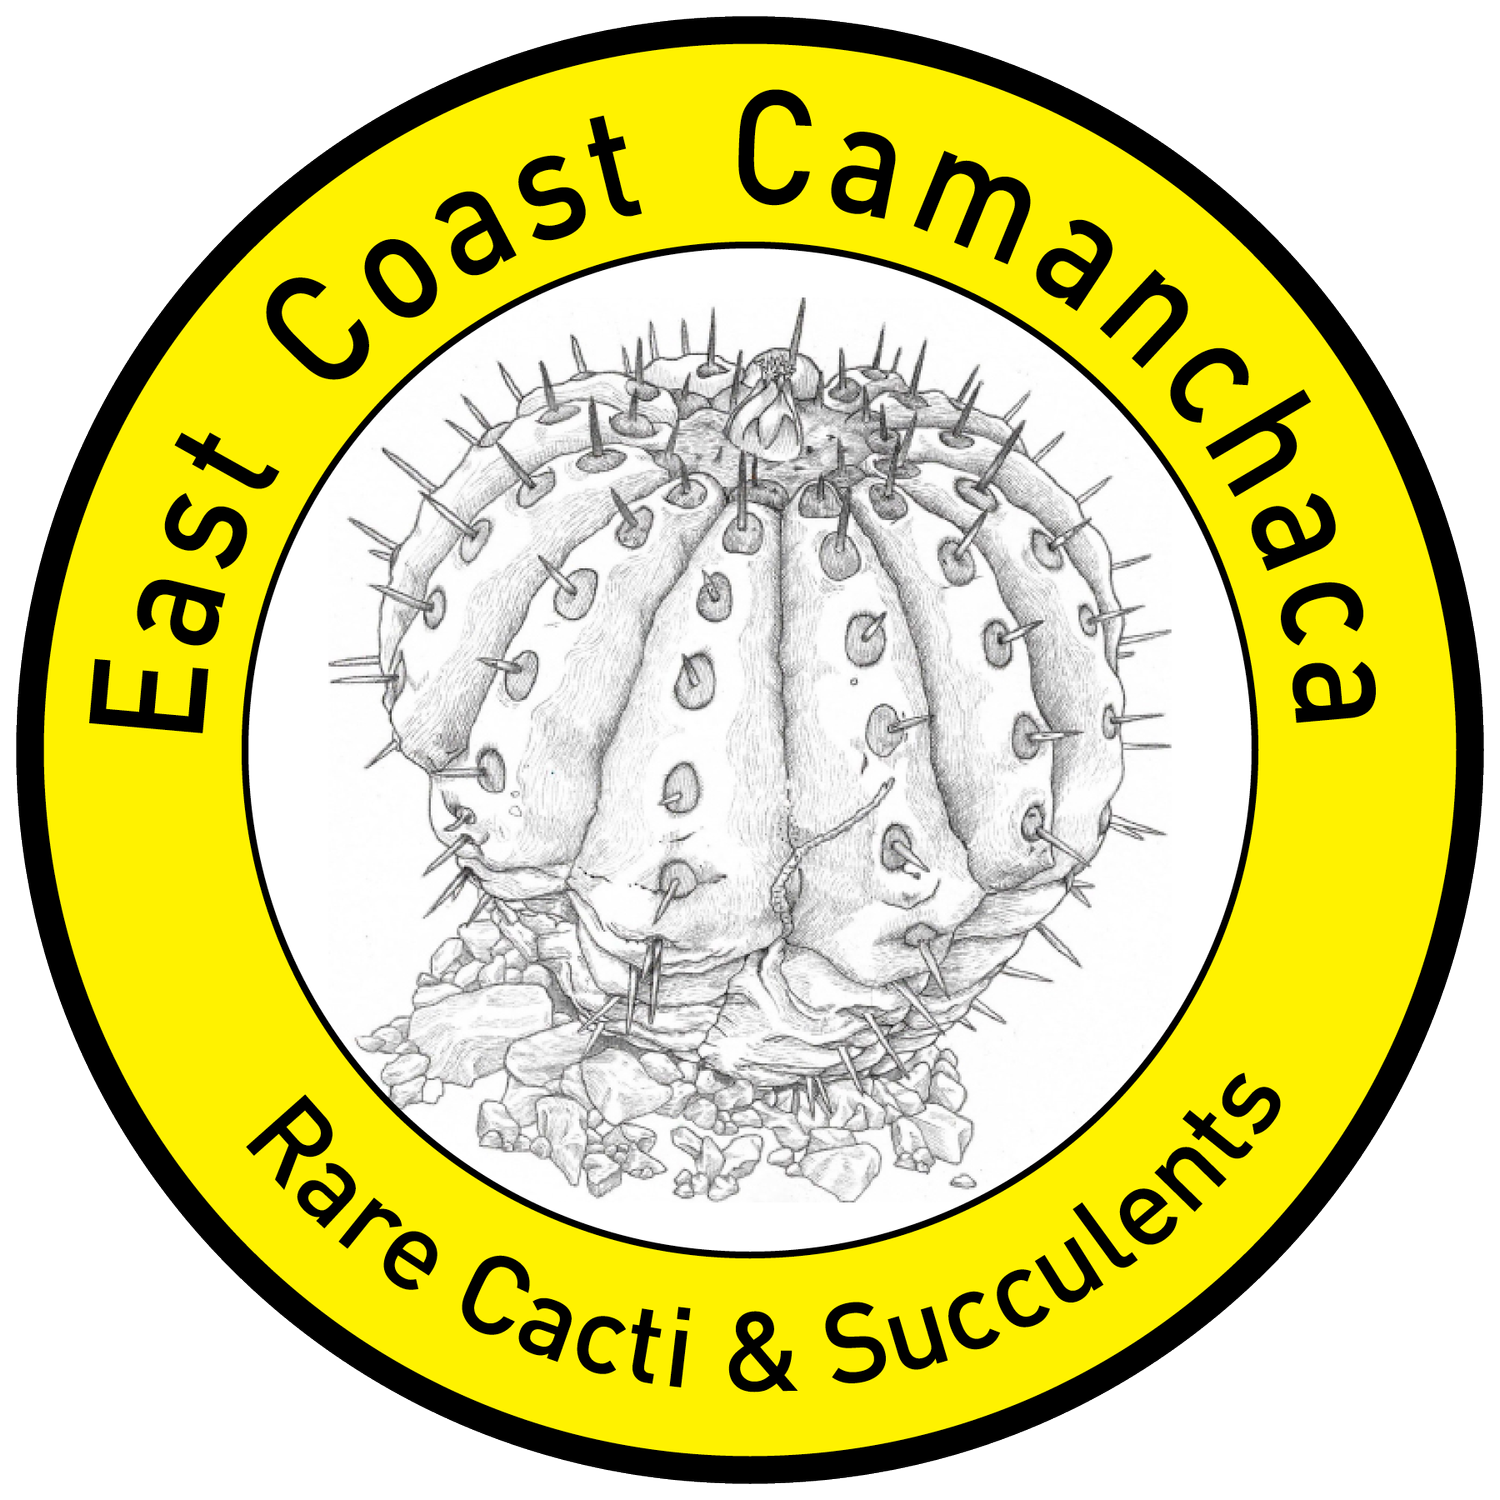
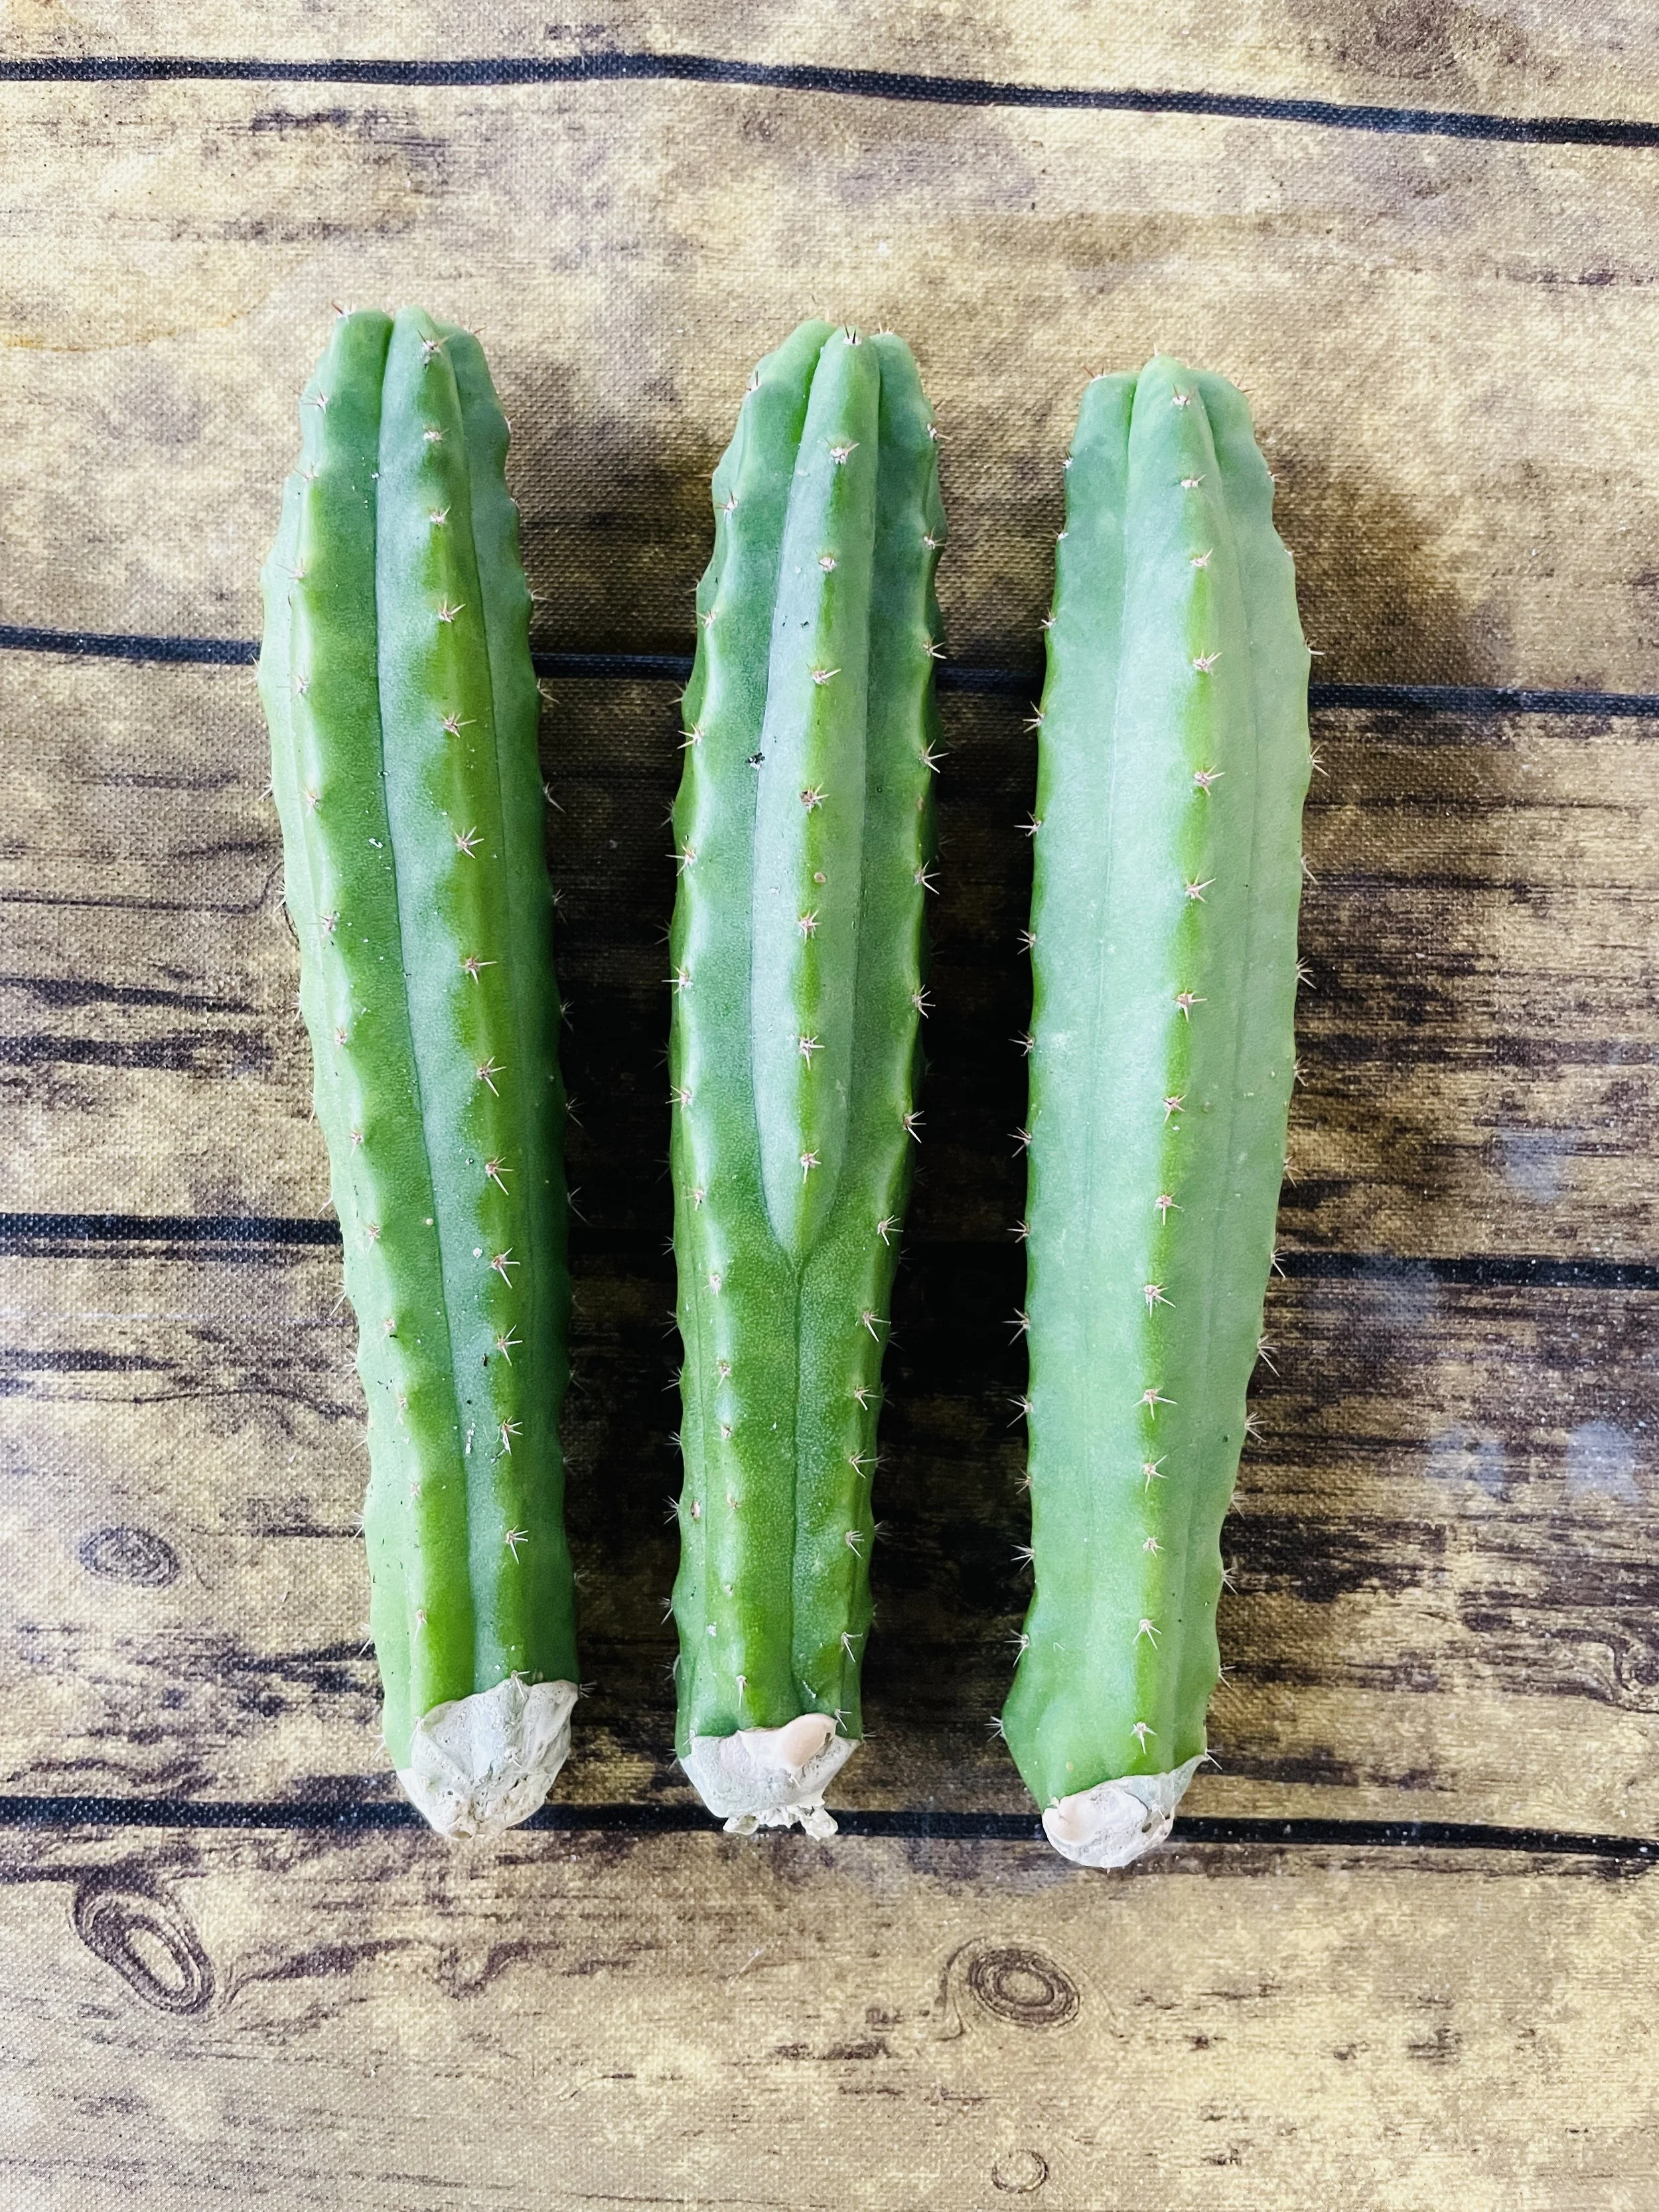
![Trichocereus cuttings]()
How to Root Cacti
-
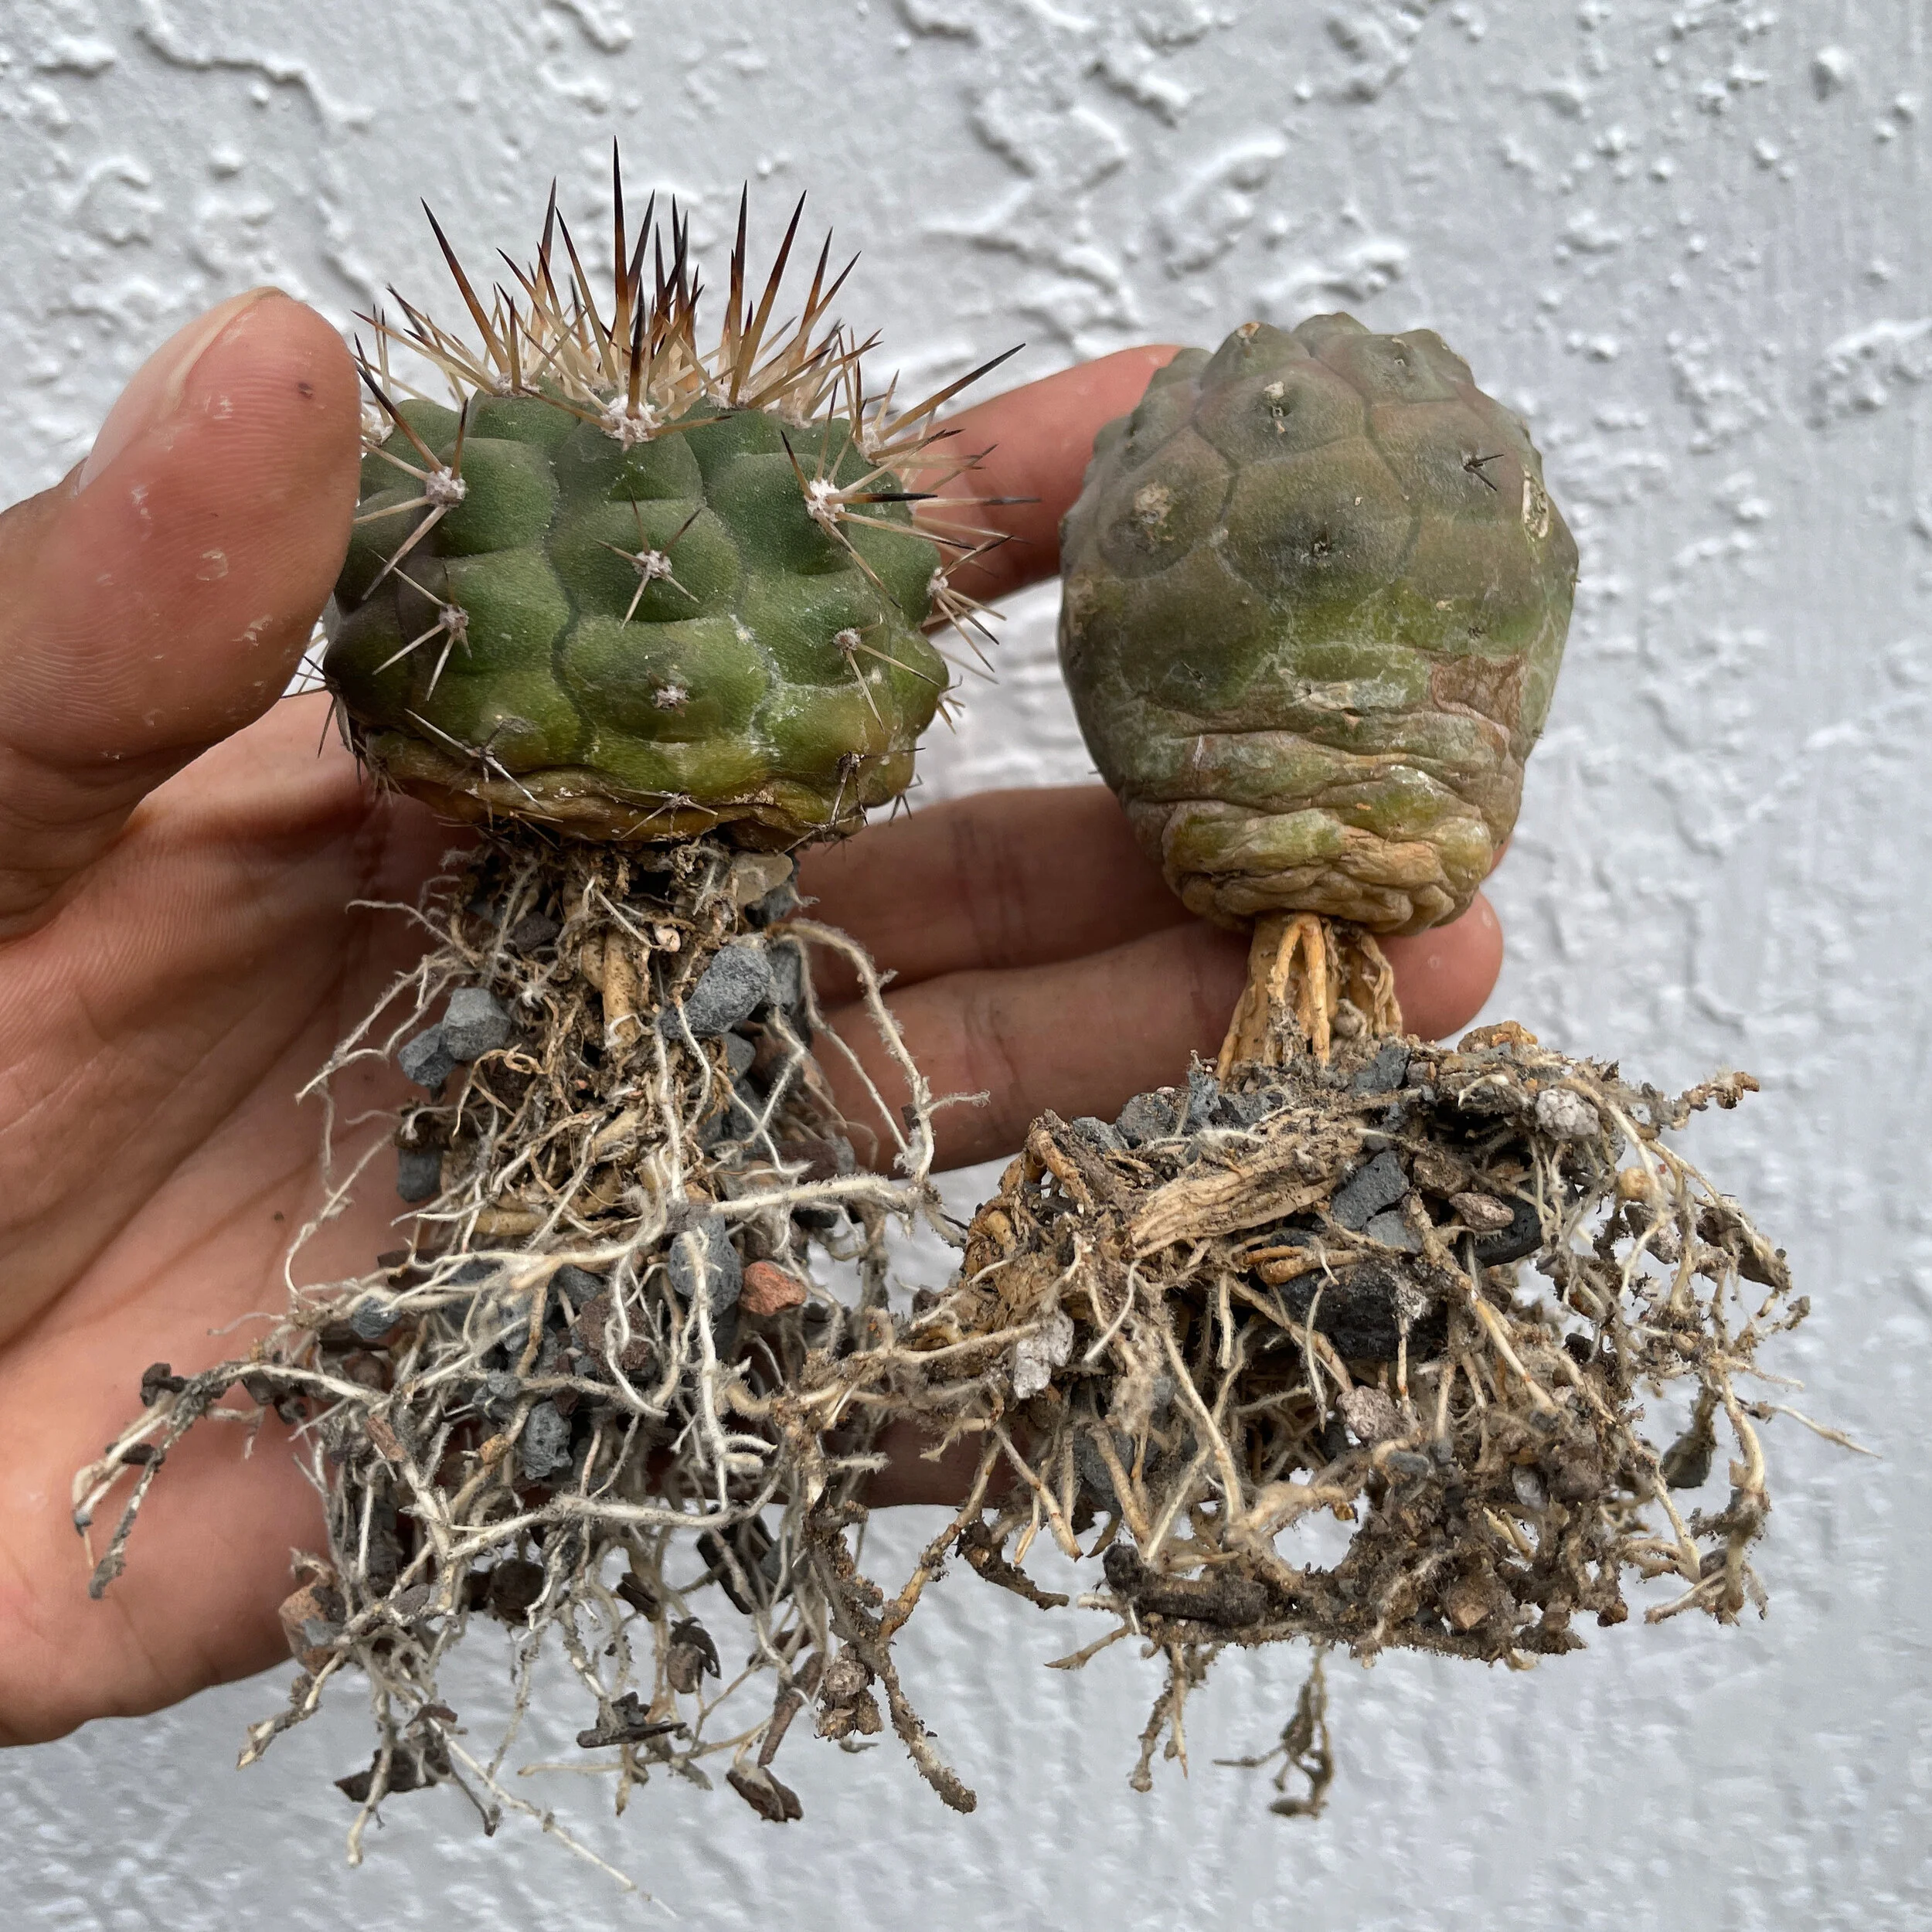
![Cactus roots in mineral soil]()
Mineral Potting Soil
-
![Copiapoa cinerea cactus]()
Copiapoa Care
-
![Copiapoa habitat.]()
Where do cacti come from?
-
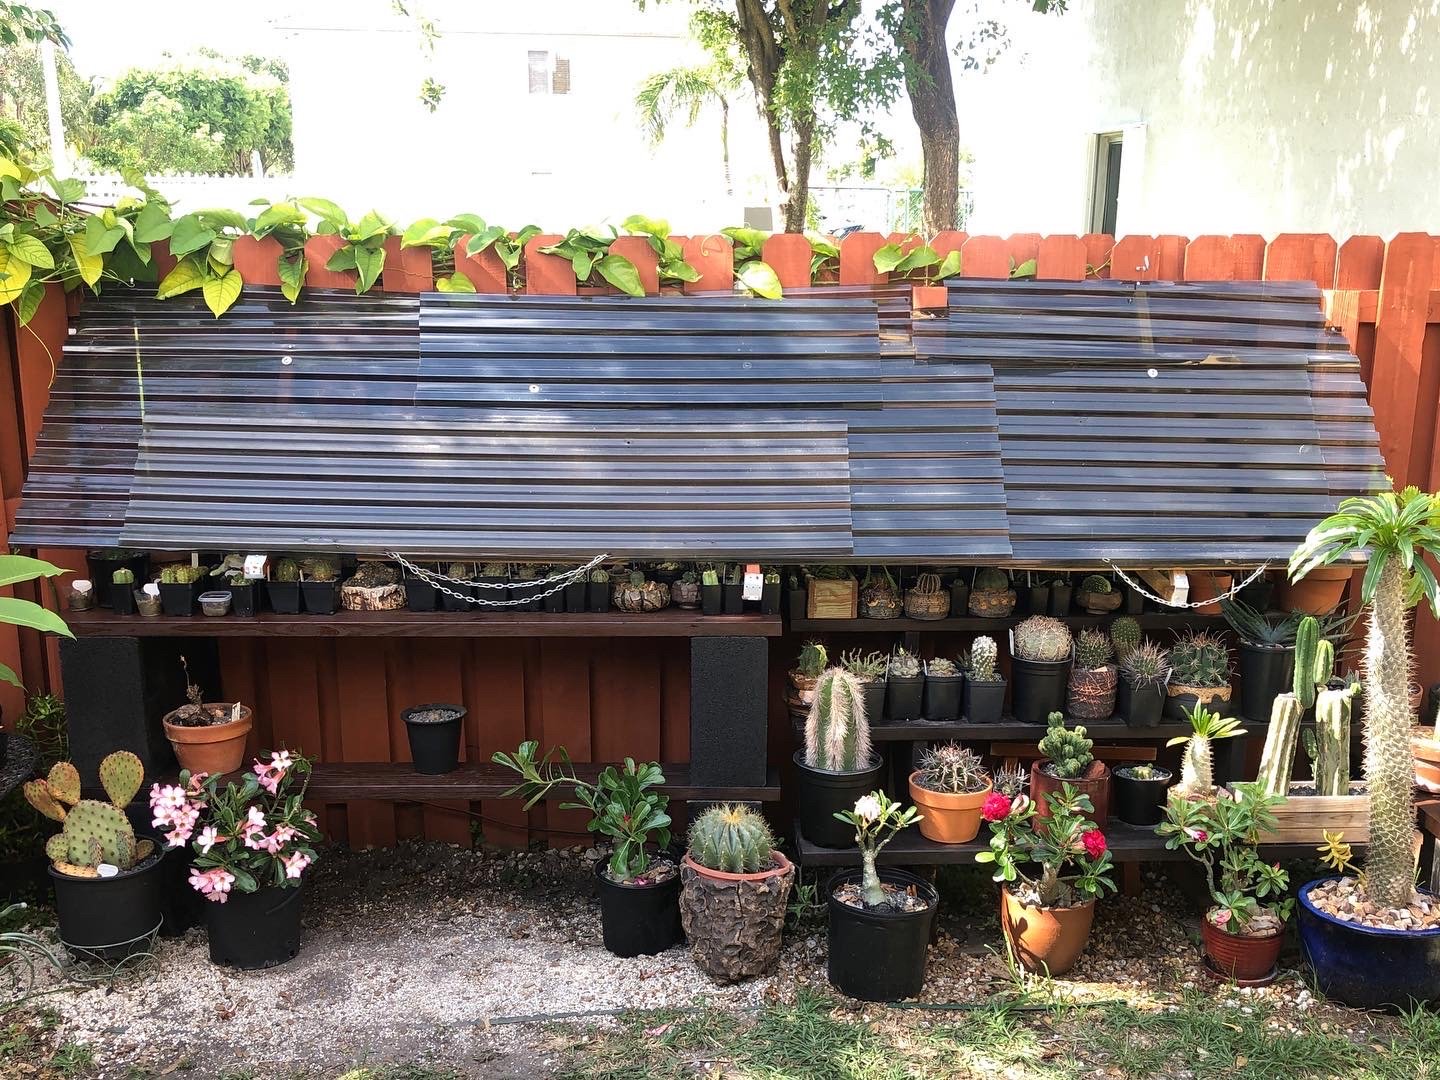
![Euphorbia succulent]()
Acclimating new succulents
-
![Rotting Astrophytum cactus]()
How to deal with rot


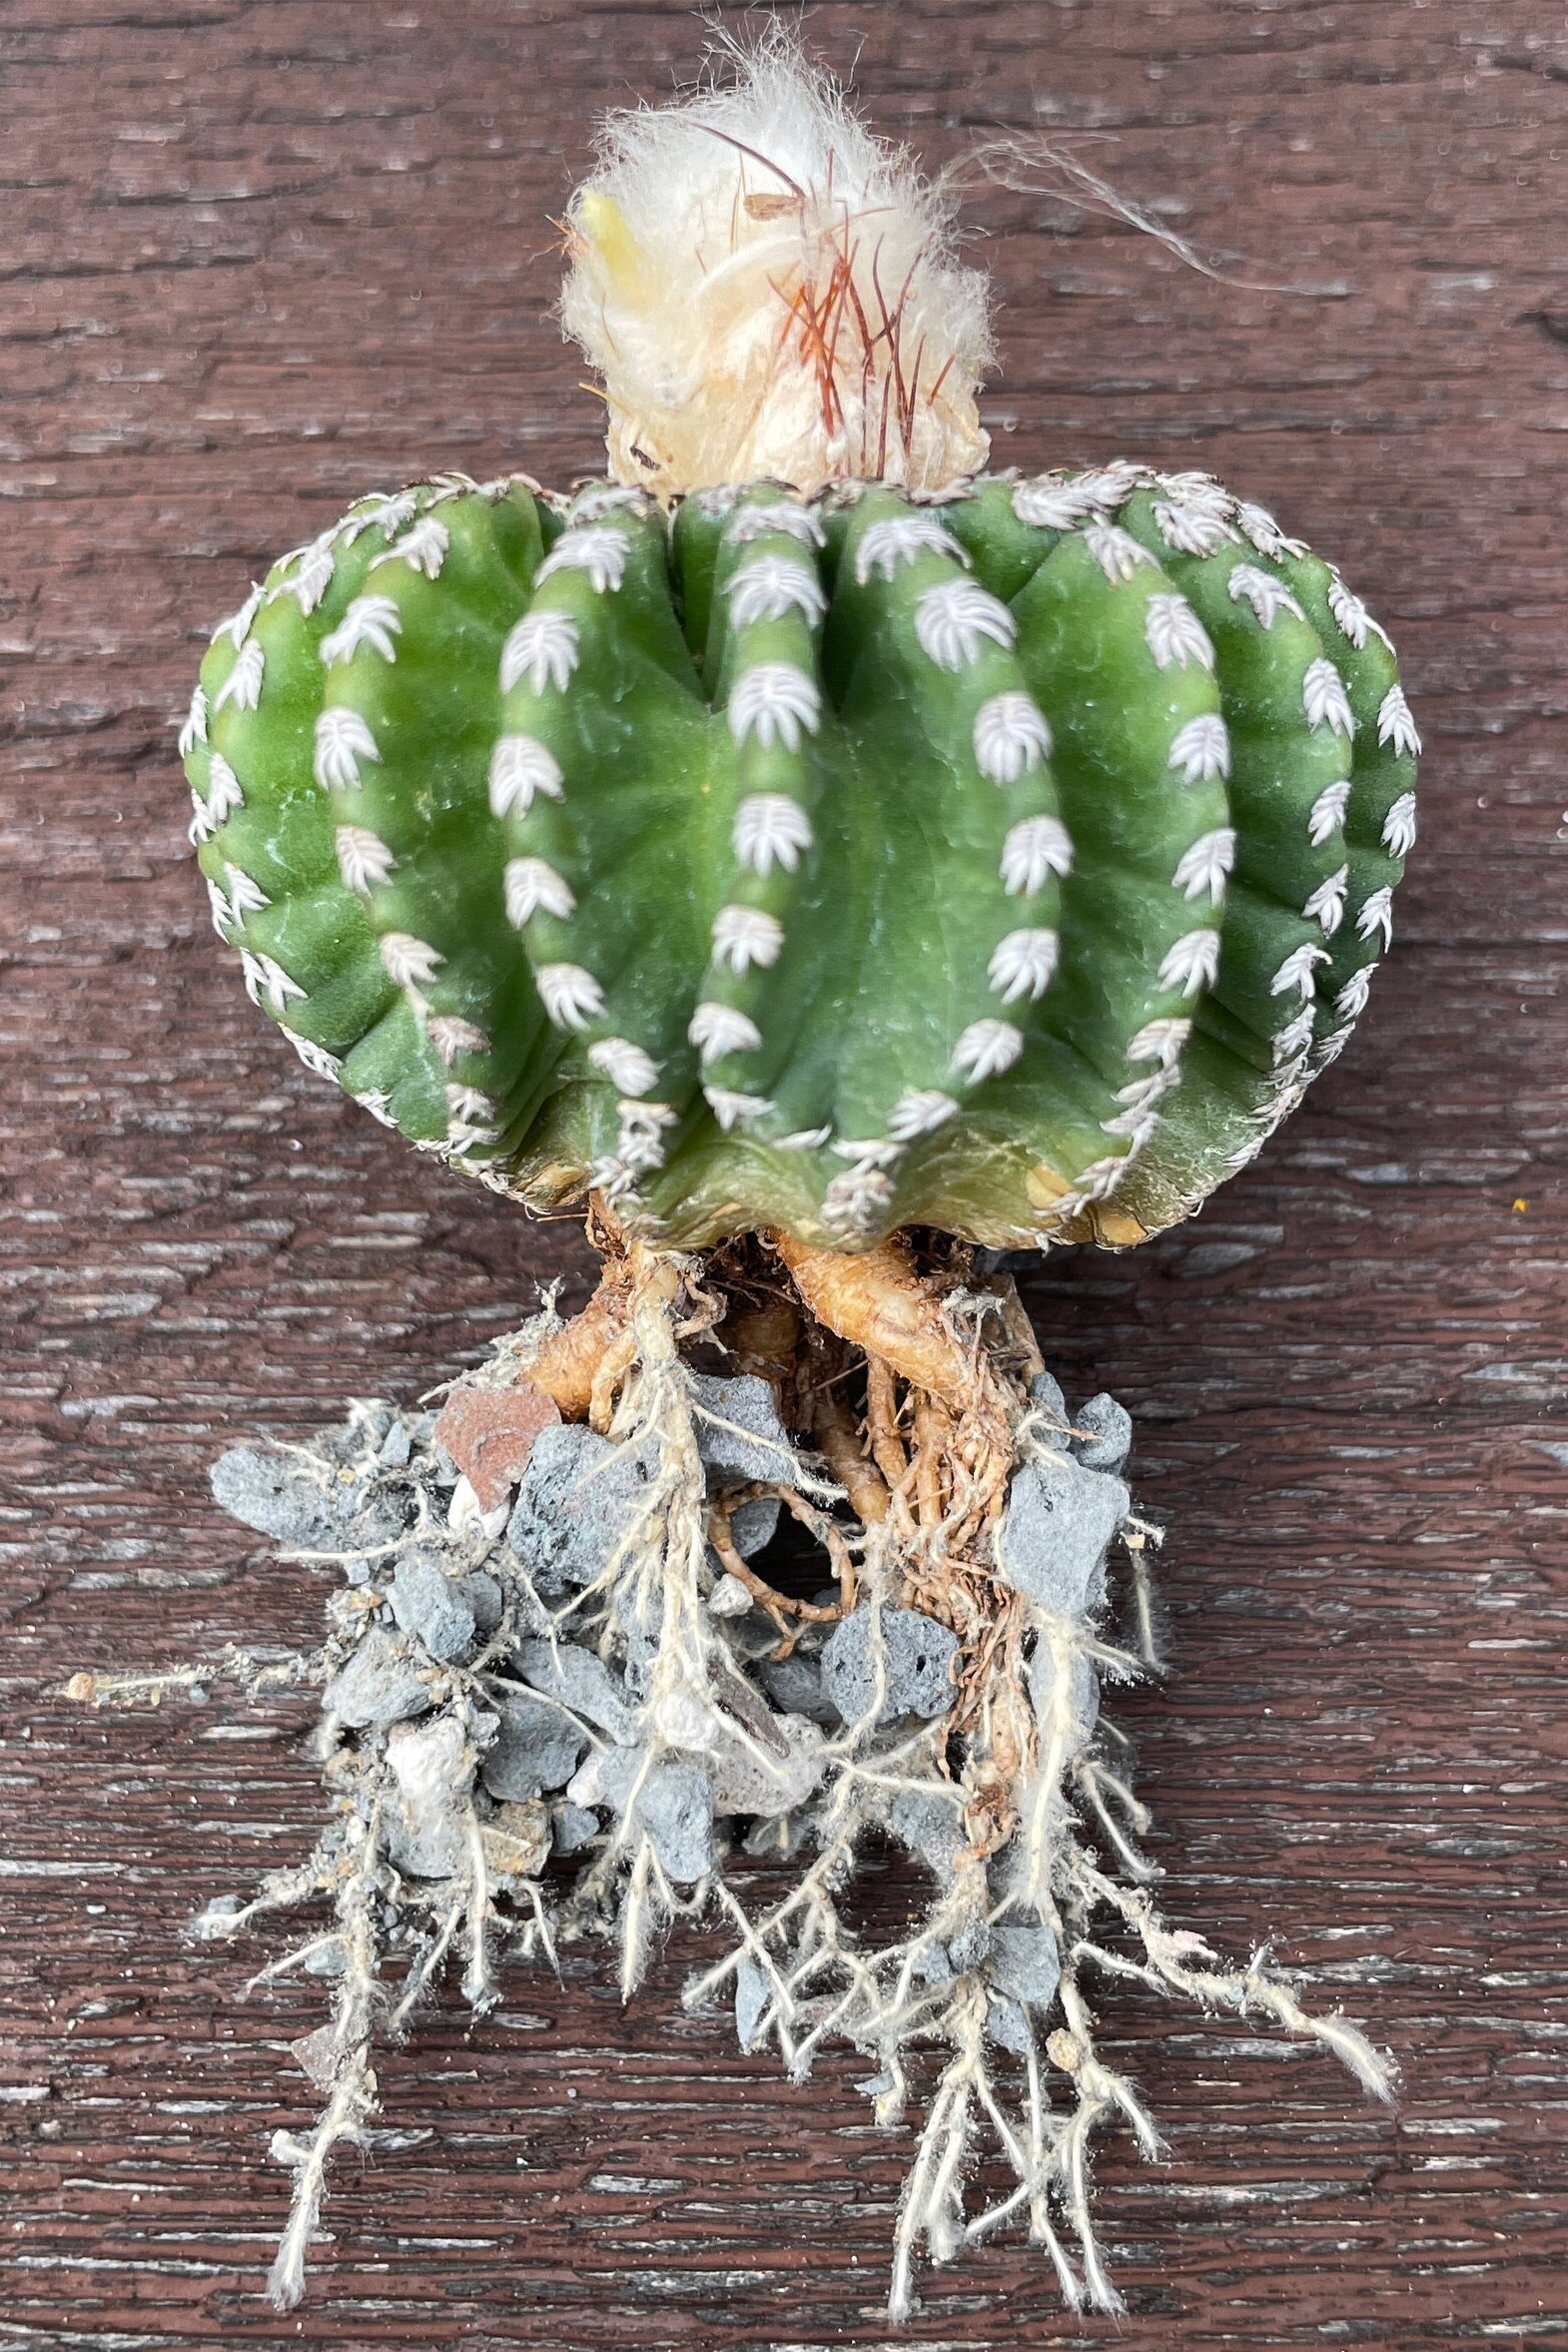
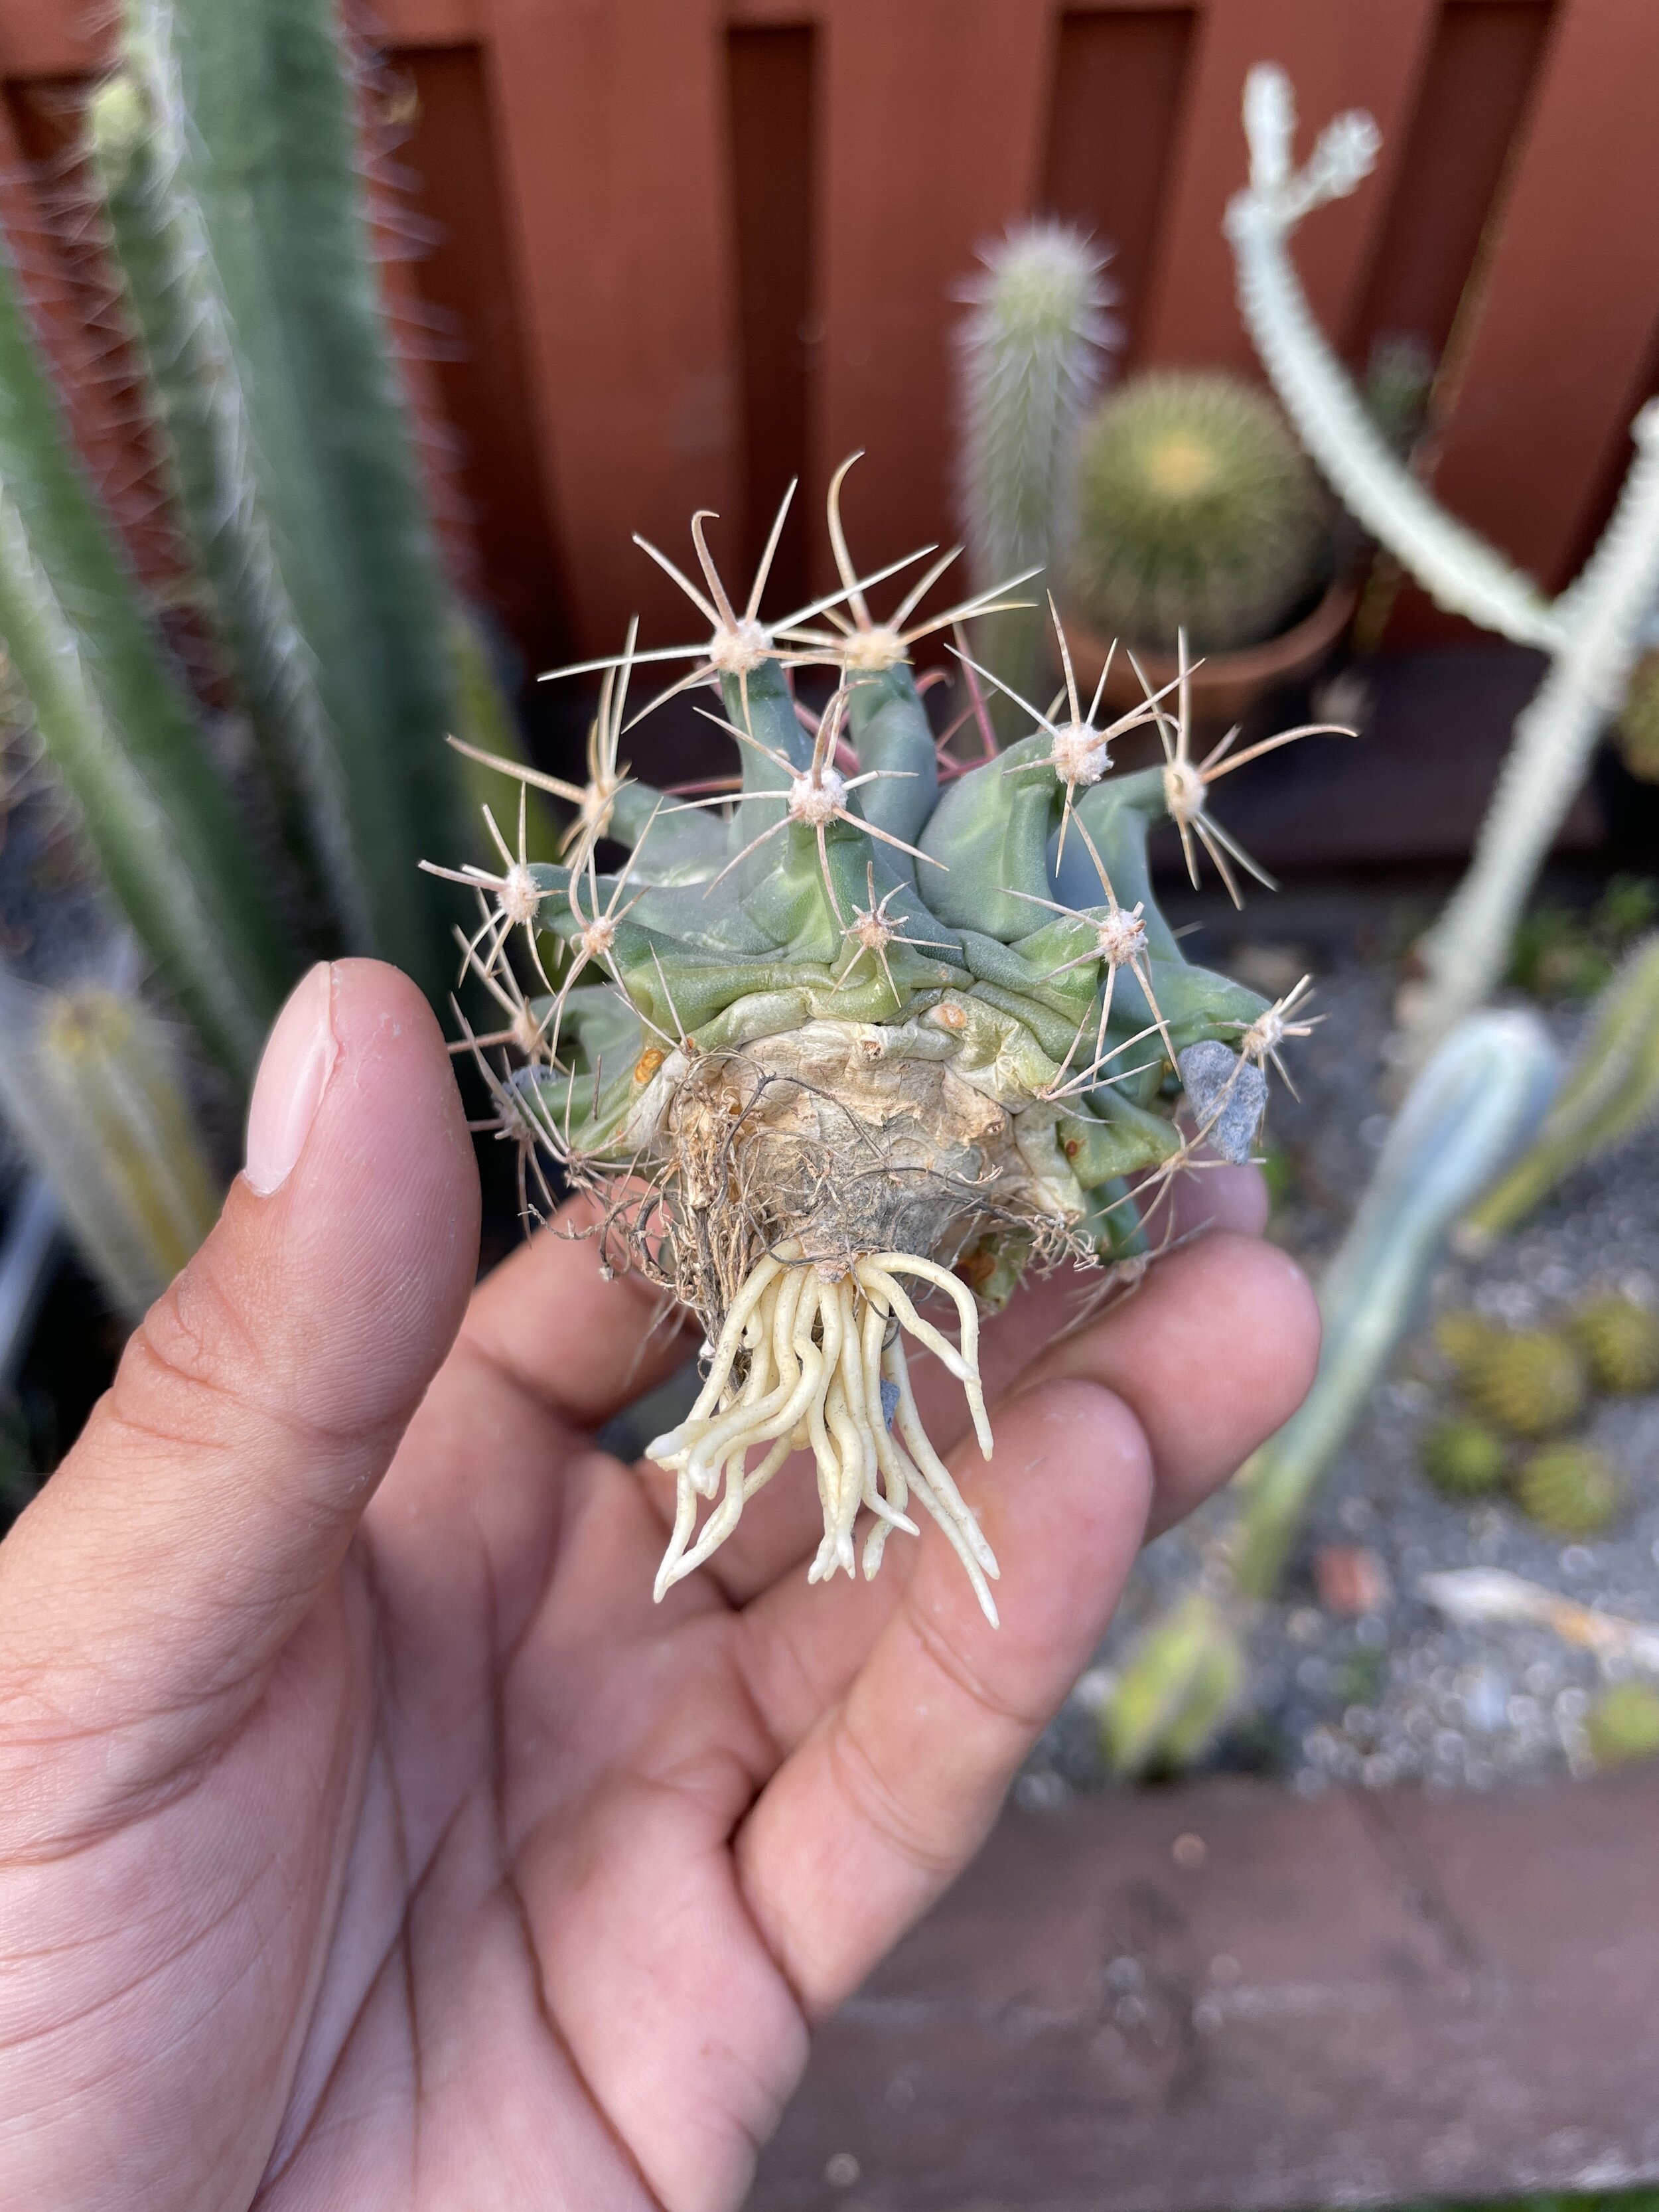
How to root cactus cuttings and de-grafts

With the rapid growth of our hobby, more and more vendors are starting to sell de-grafted cacti and succulents, as well as cuttings from their mother plants. And with some of these vendors quickly running out of inventory, they no longer have time to wait for these plants to root and are therefore selling them unrooted.
Buying and receiving an unrooted plant can be daunting for new collectors since it can be quite scary not knowing for sure if your plant will survive. Read on to find out a bit more about the rooting process and hopefully increase your comfort level with unrooted cacti.
How long can an unrooted cactus survive?
Unrooted plants are not able to absorb as much moisture as rooted plants, since as you know rooting structures are responsible for the uptake of moisture. But how long do we have to successfully root these unrooted plants, before they die?

Cacti and succulents are different from other plants in that they use their thick stems and sometimes leaves to store moisture. They are also able to “pause” their development when they sense drought coming, or when their roots are damaged, broken off, or just have not yet developed (cuttings). A cactus or succulent in this suspended state will be able to survive much longer without moisture, than one that is actively growing - effectively increasing its chances of survival even without a root system. I have had unrooted Astrophytum (very slow growing) not show any signs of root development for over a year, before finally starting to set down roots. This means we should not worry too much about a cactus or succulent dying of dehydration while it is growing root, as long as we take a few precautions.
Extra care for unrooted plants
Since we know unrooted succulents automatically go into a sort of dormancy and are NOT actively growing, we should care not to expose them to direct, or strong sunlight. I personally place unrooted cuttings and de-grafts under 2 layers of mosquito net to provide just enough light to aid root production, while also providing just enough filter (shade) to keep them from dehydrating too quickly.
Asides from filtering the sunlight it’s also important not to pull unrooted plants from the soil in order to check for roots. Cacti and succulents survive by using hormones to “switch on” all kinds of processes within their biology (such as root production) and pulling the plant from it’s soil will interrupt this hormonal process and make the plant abort the production of roots. This is because, in nature, a cactus branch that falls on the floor will not survive if it produces root that is not able to reach the ground (and moisture) because producing root will deplete the energy stored within its tissue and without the roots reaching the ground it will be unable to restore that energy before it’s completely dehydrated - put into simpler terms, a cactus will wait for the perfect opportunity to set down root and will stop producing root if conditions are not optimal (when you pull the plant from it’s soil). For this reason, it’s always best to leave them to their own devices without checking on their progress.
When I plant an unrooted cactus or succulent, I will wait a month before I start lightly watering (only during the growing season) and after 6 months I will treat it as a rooted plant (regular watering and increased sunlight exposure). You will be pleasantly surprised at how well these plants do when you “neglect” them a bit.
How can you tell when a cactus has rooted?

There are two ways you can tell when a succulent has set down root without ever pulling it from the soil:
Lightly tug on the plant - if the plant moves freely it is likely not rooted. If it remains firm, it has successfully rooted.
Check for new growth - a cactus will not exhibit growth if it is unable to uptake any moisture. Any fresh growth you see above the soil line, will signify active growth of the root system as well.
What is the best soil to root cuttings?

Since the root structure is best left undisturbed, the best soil to use is exactly the same potting soil you plan on using once the plant has rooted. It is best not to try one soil mix for rooting and then re-pot once roots form since this will stunt their growth. I personally use ECC South American cactus soil for all of my cuttings and de-grafts as it contains only 15% organic content and holds moisture just long enough to support root growth, but drains quickly and is also perfect in the long run. I have heard of people using all-inorganic soil as well as all-organic soil to root cacti, but I believe heat, the correct light exposure, and light watering are much more crucial factors in root development than the amount of organic content in the soil.
Hopefully, this small guide will help clear some of your doubts regarding the process of root production in cacti and make you feel more confident in growing your own de-grafts and cactus cuttings. If you have any plants with multiple branches, you can try it out for yourself by taking a cutting, applying sulfur powder to cure the wound, and finally planting after a week or two when you see the wound has formed a hard callous. Good luck and happy growing!
Mineral soil for cacti and succulents

When you start collecting rare cacti and succulents, you quickly learn that the peat-moss-based “cactus potting soil” that you can find at big-box home improvement stores is simply no good for more sensitive and rot-prone plants that you quickly become interested in as a collector. With so much organic content, peat-based soil is great at retaining moisture but not so good at either absorbing it once it is completely dry or draining, after becoming wet; which means half the time you are left wondering how long your plant’s roots will stay wet. As you probably know, wet roots are dangerous to cacti and they can easily succumb to rot if they are not provided the aeration and drainage they require after a “rain” (watering) event. On the other hand, many of the “mineral potting mixes” you find on the internet today are made with low-quality constituents to cut down on costs, since shipping mineral soil is not cheap. So you end up paying to ship a box of dust since low-quality mineral constituents break down quickly and turn to powder which is also bad for your sensitive plants.
East Coast Camanchaca soil mixes are made with the best mineral and organic constituents, to ensure your valuable and irreplaceable plants can absorb moisture without ever remaining wet so they can thrive and grow true to their natural traits, instead of bloated and green. ECC soil may not be for all the plants you own, but should rather be saved for those irreplaceable plants in your collection that you would definitely want to grow old with. After all, we are collecting plants that can easily cost hundreds or thousands of dollars and should not risk them to $7 potting soil.

Big Box Potting Soil
Potting soils found in home improvement stores generally work great for the type of plants found in those stores. Plants that have been in cultivation for generations, have strong root systems, and more importantly have become accustomed to those potting soils heavy in peat moss. These potting soils are widely used in nurseries because a mix high in organic content and which retains more moisture helps save on water costs and makes small plants grow faster and are somewhat safe during the first years of development. Hydrophobic plants like Ariocarpus, Astrophytum, Copiapoa, Lophophora, Pachypodium, and others have all evolved to thrive in soil that is poor in nutrients and which does not retain moisture so their root systems are able to aerate and dry out quickly after rain events. This means we must adjust our potting soil to mimic their natural habitat since potted plants have much less space to spread their roots which also cuts down on the aeration of the root tissue.
Our two potting soil mixes North and South American are safe for all cacti and succulents but do have some fundamental differences: North American is 100% mineral inorganic, while South American contains 15% organic content and MYCORRHIZAE which are beneficial fungi that help cacti roots develop and absorb moisture more efficiently.

North American cacti (Ariocarpus, Astrophytum, Aztekium, Ferocactus, Lophophora, Mammillaria, Pelecyphora, Turbinicarpus, etc) seem to be more sensitive to moisture and organic content in the soil. For this reason, I started using 100% inorganic soil for all plants larger than a golf ball and they all took off! ECC North American Cactus Soil is made up of lava rock, calcined clay, pumice, and other minerals of the highest quality so you receive small particles that do not turn to dust and provide adequate moisture absorption, retention, and evaporation. Inorganic soil dries faster and is, therefore, more forgiving of mistakes when watering because rot does not have the organic matter it needs to feed and thus has a harder time attacking your plants. Inorganic soil can also be left in a pot longer (up to 3 years) without any degradation of its constituents, meaning you have to re-pot less often decreasing stress on the roots.
ECC South American Cactus Soil can be used for smaller plants (both North and South American) because it contains only 15% organic content which is safe for all cacti and succulents, especially when they are smaller since seedlings do benefit from added moisture retention. You can also add cheap peat moss-based cactus soil to ECC North American Cactus Soil, to create your own mix for smaller seedlings or if you live in extremely dry areas where a little organic content can aid in moisture retention but it is recommended you never add more than 20% organic content (cheap cactus soil).
South American cacti and African succulents (Copiapoa, Discocactus, Eriosyce, Euphorbia, Melocactus, Neoporteria, Pachypodium, Pilosocereus, and Trichocereus, etc) seem to do better with a small amount of organic content in the mix, so our South American Cactus Soil contains 15% organic content and MYCORRHIZAE to aid in root development and nutrient uptake. It is safe and recommended for use on North American seedlings as well, since seedlings always benefit from a bit more moisture than mature plants. I do not recommend adding anything to our South American mix, unless it is to be used for plants like Trichocereus which do love nitrogen and can tolerate more moisture but I personally do not add anything on as the balance of the mix is dialed in as-is, providing the right compromise between moisture retention and evaporation.
Watering Plants in Mineral Soil

Mineral soil does drain faster than organic-based potting soil, but you should not rush to change your watering schedule. I recommend you maintain your current watering schedule and only adjust over time, if necessary. Most (if not all) plants will acclimate to the added aeration and quick drainage and not necessarily require extra watering, so it’s best to give them time to settle in before introducing more moisture. Freshly potted plants may exhibit signs of “transplant shock” and look dehydrated, but you should refrain from watering during the first few weeks to a couple of months to give the plant enough time to regenerate its root tissue.
Mineral soil can be watered from above, or by dunking the pots in water since ECC soil does not float up to the surface like other mineral soil mixes. I usually dunk them during springtime (roughly 15 minutes), and only water from above during hot summer months and fall since these are times when a wrongly timed watering can prove deadly, and watering from above will dry out faster than duking the pots. When watering for the first time of the year (spring), you can even experiment with leaving some pots submerged in water for an hour or two to “wake up” the roots but do this at your own risk since some plants may not tolerate it, and make sure to never submerge the crown of the plant, only the soil. Always make sure there are sunny warm days ahead before watering, and never water a freshly potted plant. More info on watering freshly potted plants here.
Fertilizing Mineral Soil
As previously mentioned, cacti and succulents prefer soil that is low on nutrients. This helps ensure they exhibit their best natural traits that are only expressed due to nutrient and hydric stress (low amounts of nutrients and water). Plants that are heavily fertilized may show signs of rapid growth, such as green coloring, excessive branching, and etiolation (elongated growth patterns). To avoid this, I always recommend fertilizers are used in 1/4 strength on the label and should be meant for cacti or tomatoes which means their nitrogen content is low. You can make certain that the fertilizer is correct by checking the NPK label, which stands for nitrogen (N), phosphorus (P), and potassium (K) with a number that stands for the percentage of the chemical by weight of the product (Ex. 2-7-7). Stick to fertilizers with 1-2% Nitrogen, and always dilute them to 1/4 the strength recommended on the label. I will fertilize most of my plants once or twice during spring and recommend you dilute the fertilizer, even more, the first few times you use it until you figure out the perfect dilution rate for your plants, to avoid overfeeding. I never fertilize Copiapoa, because they seem to always branch out when fed and solitary plants like C. cinerea should not form branches until they are extremely old. Feeding in extremely low dosages is ok for most plants.
Where do cacti come from?

Chilean coastline - Copiapoa and Eulychnia habitat, covered in La Camanchaca fog, responsible for nurturing all plant life in this region.
All cacti (about 127 genera in total) come from different parts of the American continent. They live and thrive from the southernmost tip of Patagonia (Argentina) to the Canadian north. Some (the most interesting of all, if you ask me ;)) are endemic to their home regions, meaning they only exist in that specific location in the world. Usually, when it comes to cacti, endemic species seem to be a bit more challenging in cultivation. Such is the case of my favorite genus: Copiapoa. Since they had to evolve to specialize in surviving in one specific climate and location, they are usually unforgiving to changes in the conditions that they are used to. In reality, this only means we must get to know them and understand them a little bit in order to keep them happy but is that not the reason we start collecting these beautiful plants?

Horticultural crisis.
A property in Chinchilla, QLD, infested with prickly pear in 1928. Image credit: Collection of John Oxley Library, State Library of Queensland
Although cacti originated in the American continent, human activity has enabled the spread of cacti throughout the planet with varied consequences. In Australia for example Opuntia stricta (prickly pear) was introduced in an attempt to build an agricultural fence and to start a cochineal bug dye business. Both efforts were major failures as the plants quickly became invasive and rendered 40,000 km2 of farming land unproductive. The disaster even led to the illegalization of many cactus species in Australia, and later the moth Cactoblastis cactorum from South America had to be introduced to wipe out the invasive Opuntia population as the moth’s larvae eat prickly pear.

Don’t call me Echinopsis…
Another interesting example of human interaction with the natural distribution of cacti, is a favorite genus for many: Trichocereus (or Echinopsis if you’re lame lol). Trichos are found in Argentina, Bolivia, Colombia, Chile, Ecuador, and Peru but the precise origin of these beautiful plants is a mystery! Trichocereus pachanoi for example has a long history of religious use by cultures like the Moche and the Chavín from Peru, dating back 2000 years. This means that human trade may have contributed to the largely widespread distribution of Trichocereus we see today. It’s easy to imagine that plants that were relocated 2000 years or more ago by ancient human civilizations, were able to continue their evolutionary paths adapting to new environments and paving the way for the many different forms of Trichocereus we see today. Aren’t cacti amazing?
With the brief history lesson behind us, let’s get into some distribution maps, shall we?

North American Cacti
Most cacti in the northern part of the American continent are distributed between the southwest part of the United States and pretty much all of Mexico. Considered by many to be the cactus-mecca of the world, Mexico is home to 669 species, out of which 518 are endemic. Mexican cacti account for about 50% of all known cacti species. All in one country!
Some of my favorites from this region include Ariocarpus, Astrophytum, Epithelantha, Ferocactus, Lophophora, Stenocactus, Pachycereus, and many others. I did not mention Opuntia because it is not one of my favorites (glochids really suck) and it is also found in South America.

South American Cacti
Located just a few thousand miles South of the so-called cactus-mecca country of Mexico, is the driest desert on earth - The Atacama desert. It is the only true desert to receive less precipitation than polar deserts, and some areas have not seen any rain in over 50 years! The reason I mention The Atacama first, is the common misconception that Copiapoa comes from this desert when in reality they come from the neighboring coastline on the western side of Chile.
All plant life in this miraculous micro-climate survives with only the moisture provided by the thick fog that covers the region since the vast precipitation which is present on the west (Amazon Rainforest) is blocked off by The Andes Mountain range.
Besides Copiapoa, my favorites from South America include Acanthocalycium, Browningia, Discocactus, Matucana, Trichocereus, Parodia and Pilosocereus but for some reason, my top favorites are all in Chile.
I hope this brief breakdown of species by location can help you better understand your plants, but more importantly I hope that knowing a little more about them will hopefully spark your curiosity and inspire you to learn even more about their origins and the “why” certain techniques may or may not work in cultivation for some, but not others.
Now that you know who is from where, what team are you? North or South?
What to do with a new cactus or succulent after shipment.

So you found that dream Copiapoa cinerea, or maybe an Ariocarpus Godzilla that you had been looking for obsessively and were lucky enough to claim it on time! The package arrives and you have soil and a nice pot on hand, so you are ready! Maybe you have read that Copiapoa and Ariocarpus are both sun-loving plants and look for the perfect sunny spot to place it. WAIT!
Lets talk a little bit about light exposure, and water, before you select a location for your new plant.
Correct light exposure for a cactus fresh out of a shipping box.
Cacti and succulents carry out many tasks by utilizing hormones that act as “triggers” within a plant’s anatomy, that start-off important processes. When a plant senses moisture for example, it deploys a hormone that tells its root system where the moisture is and what direction it should grow towards. On the crown, a similar process tells the plant what direction to grow towards by deploying a hormone to the parts of the plant that receive the highest solar radiation. This second process is also involved in shielding the plant from excessive sun, by tilting the plant in a direction that is optimal for photosynthesis but also by making the tissue which is exposed to the higher levels of radiation, more resistant to such solar radiation. What does this mean for us in cultivation?
It means that plants slowly build up a tolerance to sun exposure, in a very similar way that human beings do. If you were to travel from a norther location where your skin was not accustomed to much sun, down to the tropics (where the sun is more intense) and did not care to apply sunscreen, you would likely burn. Cacti are very much the same. In order to shield them from the initial burn that can come from being used to the total darkness of a box, we must provide shade-cloth or other materials, to filter the sun until the plant is able to acclimate to it’s new environment.
Acclimating a new cactus to full sun.
There are two ways to acclimate your new plants, and either works just as well. The most important thing is that the changes in exposure must be done slowly over time. Check out the examples below:

Dedicated area for new arrivals: I personally have an area dedicated to new plants that must be acclimated, which has a dual layer of mosquito net (cheap and does the trick) on one side, and a single layer of mosquito net on the other side. When a plant arrives, I place it under the dual layer for a month to a month and a half and then move it to a single layer for an additional month. Most of my plants will then stay under a single layer, since only some generas, and larger plants can take full sun.
Single-plant solar protection: Sometimes when a plant arrives that I intend on keeping, I will acclimate it directly in its final location by covering it with a small piece of mosquito net. Since most of my grow area is covered by a layer of mosquito net, the small piece of mosquito net acts as the secondary layer of protection which I remove after a month or two.

Whichever method you prefer is OK, and both work just as well. I would only comment that I have had instances where the small piece of mosquito net (option 2) touched a plant and left a mark so it’s important to provide a good solid structure for the mosquito net so it will not come into contact with the plant, if possible.
Watering a new cactus or succulent.
Some people like to water their cacti as soon as they arrive, while others prefer planting in slightly moist potting media. Living in South Florida where humidity is above 85% throughout most of the year, I go above and beyond to avoid rot so I never water a cactus or succulent until it has rooted into the soil. This can take 2 weeks (small seedlings) to 2-3 months (mature and hydrophobic plants). You can check if a plant has rooted by lightly tugging on it. If the plant moves freely, it has not rooted. When your cactus does set down roots, it will stay firm in place. I do not recommend removing a cactus from it soil to check for roots as that will likely stunt their growth. After 2 months, it’s safe to water even without checking for roots as long as it is during the growing season (spring and summer for most plants).
After I water, i usually move plants to their permanent location where they receive 70% sunlight for 10 hours during the day. Once they have set root, usually they are also ready for more solar exposure but you should keep an eye on them just to make sure there is no whitening of the skin which would mean sunburn. If your plants turn a bit red or purple these are signs of sun-stress but are OK as long as the colors are not too strong. A little stress is what cacti love. With all that said, please keep in mind that every environment is different, so you should use these tips as a staring point to do your own experimentation in order to figure out what your plants love. I hope this helped some of you :)
How to save a rotting cactus?
Is your favorite cactus or succulent rotting? Don’t worry, we’ve all been there, sometimes there is nothing you could have done to avoid it, and today we will go over exactly what rot is and how you could save your plant if you are able to catch the onset of rot early on.
What is rot?
Rot on cacti and succulents is caused by a fungal infection that attacks the skin or the root system of a plant. If not addressed quickly, rot will work its way into the plant’s vascular bundle (veins traveling up and down the center of the plant), and eventually infect the entire plant.

How do I know if my cactus is rotting?
Any darkening of the skin should be carefully inspected daily. If the affected area grows or if the plant exhibits any softness, it should be treated in order to prevent any further spread which will kill the plant. It is important to note here, that cacti can exhibit light softness dues to dehydration and this is completely normal. Softness related to rot is usually accompanied by darker skin and is so severe you will feel the skin will almost want to rip when pressed.
Treatment.

Once you have identified that a plant has rot, you want to remove it from your grow area as soon as possible to avoid contaminating your other plants. Then, grab a sharp blade and clean it thoroughly with rubbing alcohol. Cut away all of the rot until you see no dark or orange tissue, and quickly apply sulfur plant fungicide on the cut to avoid any further fungal infection. Always treat in the evening when the sun is not too strong, and place treated plants in 50% filtered sunlight for 2-3 weeks or until the cut has been calloused and becomes firm. Make sure to check on treated plants for any further softening or discoloration as fungal infections may persist if any rotted tissue was left behind.
How can I avoid cactus root and surface rot?
Many factors have an effect on rot and fungal diseases in cacti and succulents. Mainly: soil, light, and ventilation must be adequate in order to prevent root and skin rot. The soil must be mainly inorganic, your plants should receive 8-10 hours of unobstructed (lightly-filtered) solar exposure per day, and there should be enough space around your plants for proper airflow (or fans should be introduced).
I hope this short guide and video on rot and its eradication was useful to you, and hopefully, you were able to save a plant or two!
How to care for copiapoa?
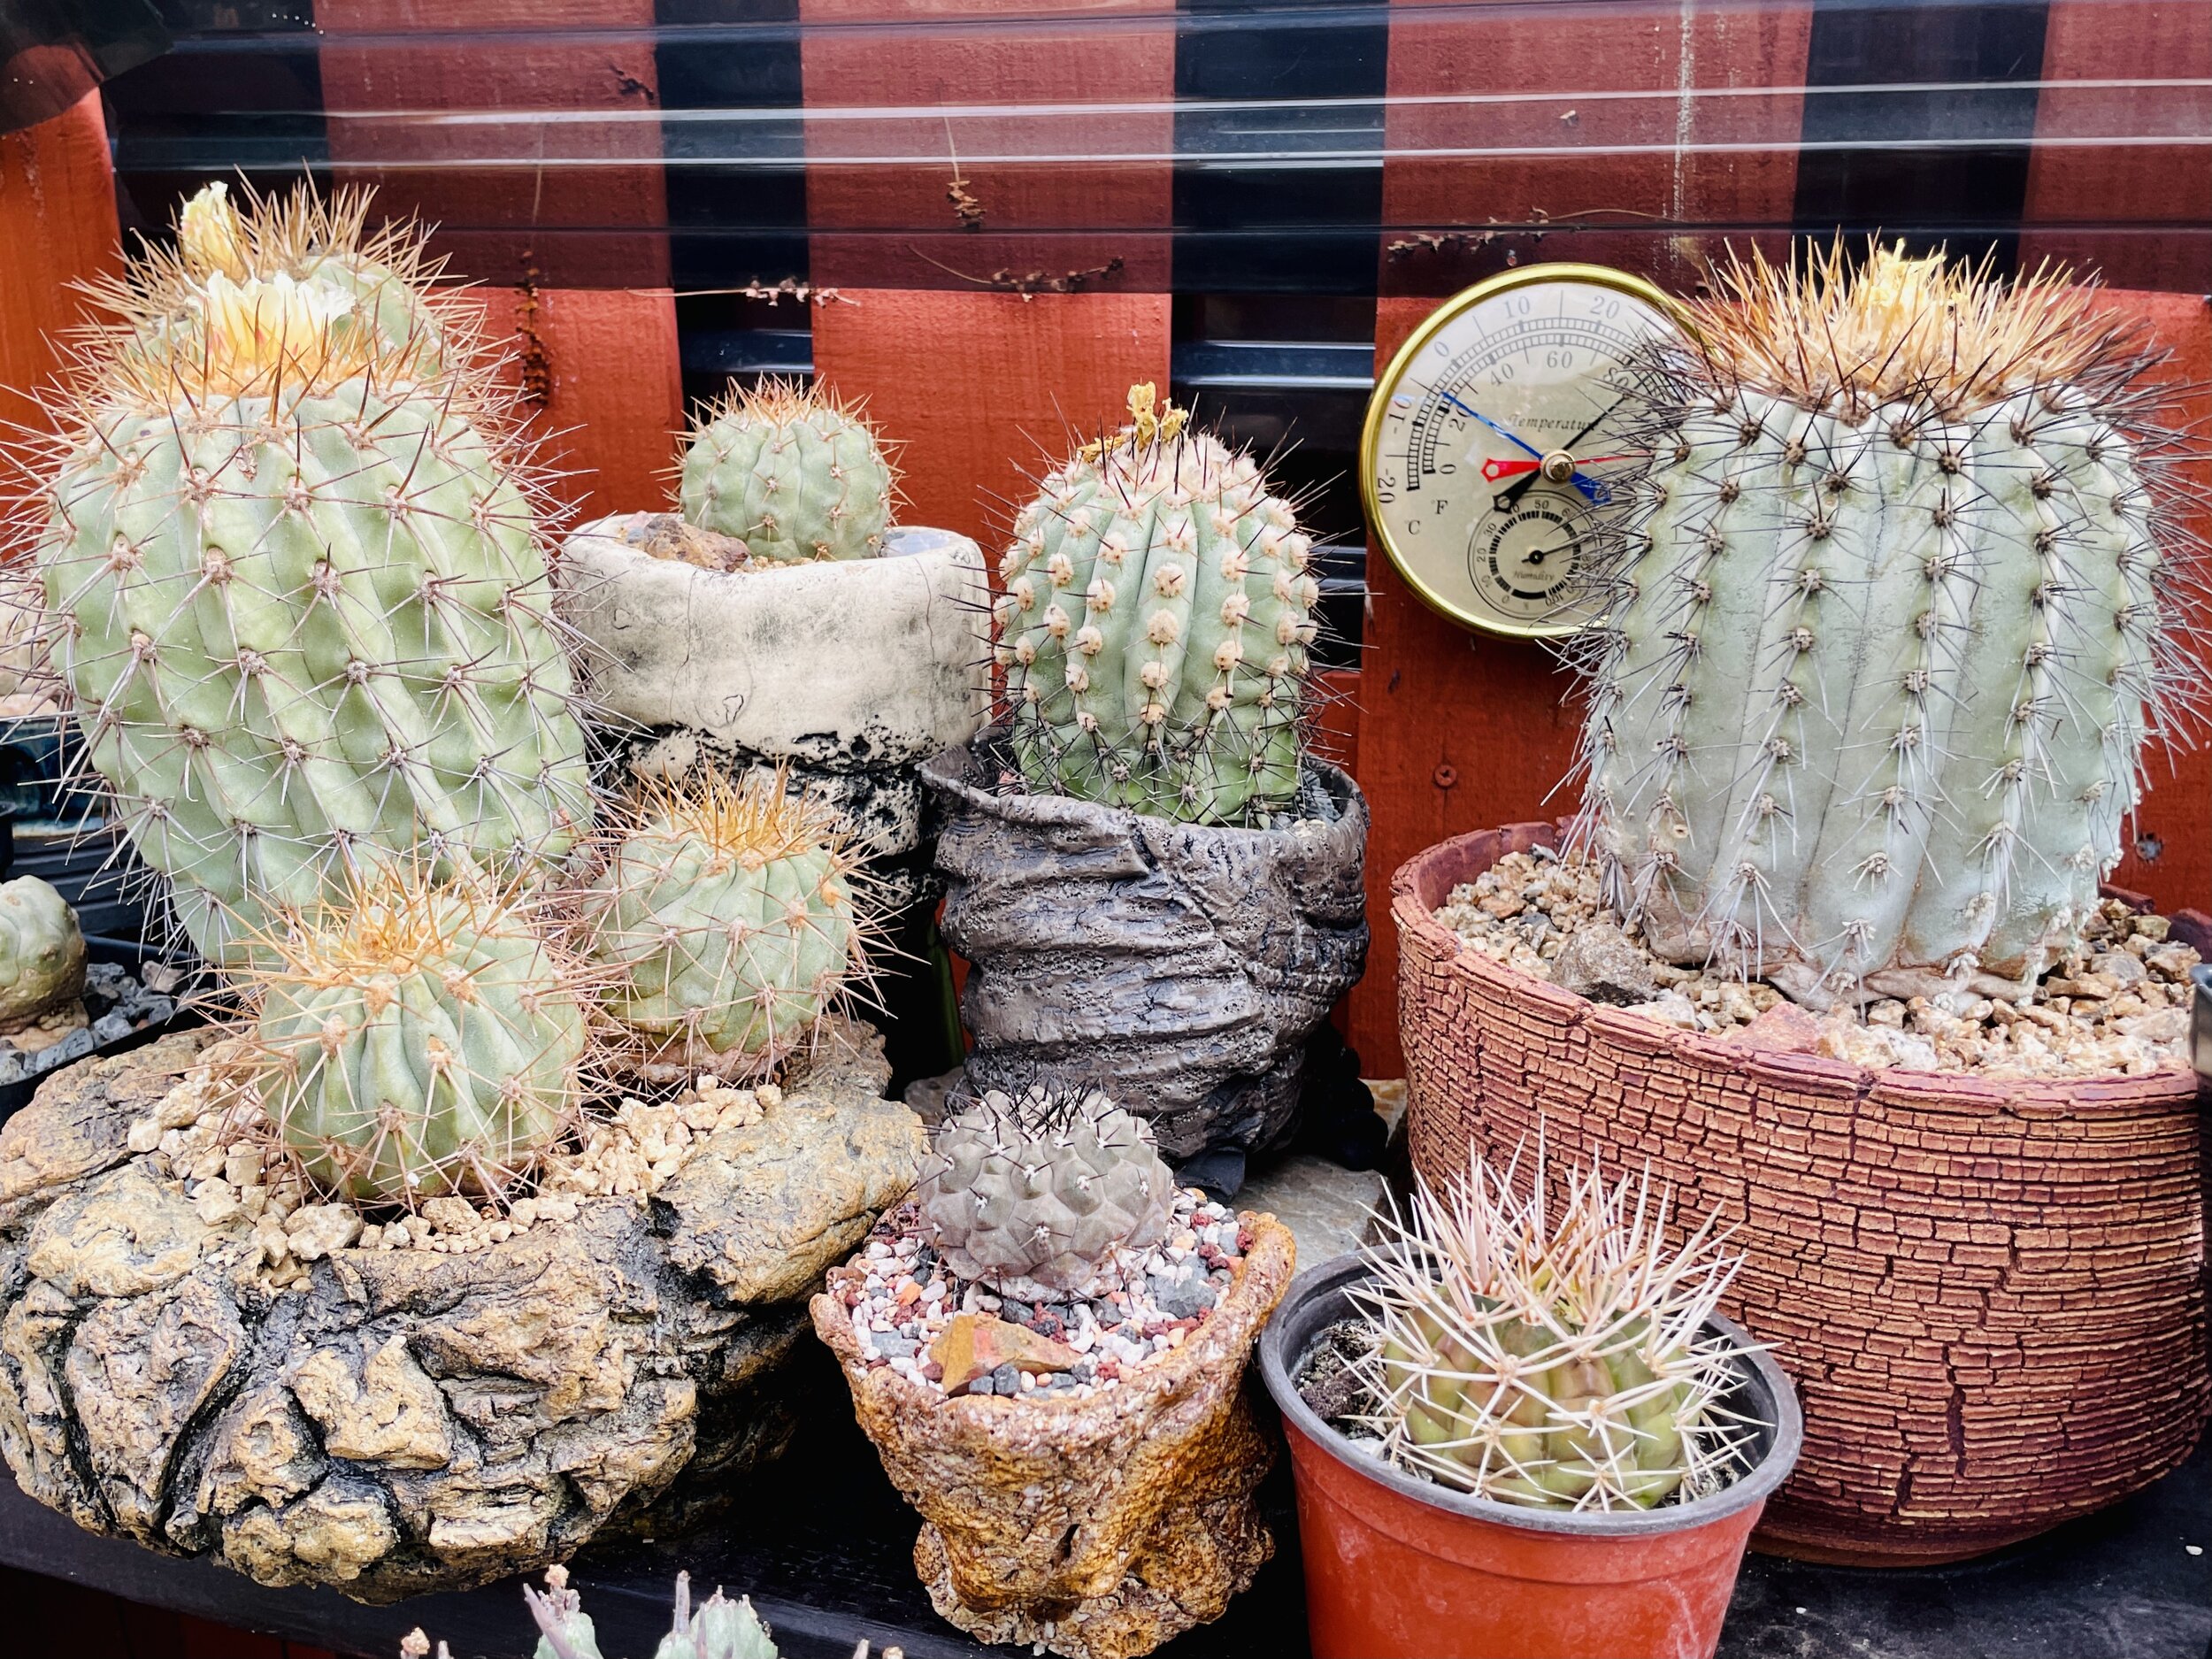
The genus Copiapoa seems to be at the top of everyone’s wishlist nowadays. Plants like the almighty Copiapoa cinerea have become hot commodities that are seemingly impossible to find, and the social media cactus-craze is fueling the fire.
But with so many beginner collectors currently lusting and searching for these plants, I thought I’d try to put as much information that I have learned about these wonderful plants as possible into this brief cultivation guide to hopefully help some of you keep your new babies alive.
As with any and all plants your specific climate and conditions will affect Copiapoa cultivation, so you will need to experiment for yourself as there are never any one size fits all solutions. With that in mind, there are some aspects which could be considered somewhat universal (to an extent).

Soil
Cacti and succulents, in general, prefer nutrient-deficient soil and growing mediums that can drain almost immediately. They have evolved over thousands of years to survive drought, and have become highly efficient at taking advantage of even the smallest amounts of moisture in very short periods of time. As you can imagine, this skill is very useful if you live in the driest place on earth, where the only moisture comes from “La Camanchaca” - the dense coastal fog which nurtures the few plants strong enough to survive on the Chilean coastline. For this reason, we recommend mostly inorganic and mineral potting mixes like our South American cactus soil. Using the correct potting soil will not only help keep your plants from rotting if you were to make a mistake watering too soon, but will also help keep your cultivated plants growing more compact and producing more farina (white waxy coating) like plants found in habitat.
Light
Like most cacti and succulents, members of the genus Copiapoa love plenty of hours of light exposure. 8-10 hours per day is considered “optimal” but that 2 extra hours will make all the difference when it comes to growing more compact plants that bloom throughout the growing season. The light must be filtered (I personally use a single layer of mosquito net), as plants will only accept direct sunlight during the morning hours without being scorched. It’s important to keep in mind that as with any plant, Copiapoa should be acclimated to optimal sunlight exposure over time and that the change should never be abrupt. A newly acquired or freshly potted plant should be placed in 50% filtered sunlight, not watered and allowed to acclimate over 1-2 months. Yes, they can take it :)

“The light must be filtered (I personally use a single layer of mosquito net)”
Water
The single most daunting aspect when it comes to Copiapoa cultivation is water, but I have purposely placed it last because I believe that if the soil and light exposure are correct, you can get away with making mistakes when it comes to watering and your plants will be more forgiving. For example: if your plants are only receiving 6 hours of sunlight per day, you may still run into trouble when watering if your soil mix contains too much organic content.
My plants receive 10 hours of filtered sunlight every day, are potted in 80% inorganic content and I water them once each 3 weeks during the springtime with rainwater (Small seedlings may need water once every 2 weeks or even 1 week depending on size). I stop watering at the end of June and then only lightly mist my plants once a week in the afternoons, until the fall. During fall I will lightly water once each 3 weeks and during winter I will not water at all once temperatures dip under 75 Fahrenheit.
Disclaimer: Yes, you can probably water Copiapoa more often and use more organic content and make them grow a tiny but slower, but be aware that the form and appearance of the plants will not be the same as those grown under the right stress conditions. Plants grown in more organic content and watered more frequently will show greener colors, more elongated bodies, and spines that are less dense than those of plants grown under higher solar radiation and increased hydric stress. I hope this answered some of your questions, and stay tuned for more on Copiapoa on our Youtube channel.

How often should I water cacti & succulents?
It all begins with an idea.

The single most asked question I receive from followers of East Coast Camanchaca relates to the frequency with which one should water cacti and succulents. It is probably the most daunting of all challenges faced by beginner growers, and for good reason! Watering mistakes can be the most volatile in cacti culture since one single wrongly timed watering could rot your priceless plants.
When I started collecting cacti and succulents, I too was very preoccupied with trying to learn when and how to water my cacti and succulents to keep them healthy and away from root rot. I quickly realized that most of my cactus casualties were being caused by potting soils heavy in peat moss. This ingredient is used across most (if not all nurseries) due to its moisture retention properties and cheap cost, and if you manage to figure out the precise watering schedule for each one of your plants, peat moss probably works great. The issue with cacti is, they go dormant when they experience extended periods of drought and for this reason, we can never allow the roots to stay wet for extended periods of time.
Once I figured out the issue, I set out to ask as many annoying questions as I possibly could to as many seemingly knowledgeable growers as I could. I read about geology and the mineral makeup of the habitats of the plants that I loved and even made the trip to see some of them in the field. I touched the soil, examined the conditions in which they seem to prefer to live and seem to thrive. And from all this, one thing was very clear: even in habitat, it is those plants that are able to drain the fastest after a rain event that thrive and live the longest. All the plants I found with the nicer forms and largest bodies were found on hillsides with the most light exposure (filtered) throughout the day, and lived in extremely gritty soils. All of these similarities, bring us to our next point, not a single piece of advice in cacti culture can be spread across all species and across all environments.

With around 10,000 succulent species of which about 2,000 are cacti, found worldwide except for Antarctica, you can imagine these plants have evolved to survive and thrive in ALL sorts of environments and weather conditions. It is for this simple reason that it would be impossible to cover the needs of them all in a single piece of text. Imagine coming up with a diet plan which worked for the entire human population? Coming up with a cultivation method that worked for all succulent species would be even more difficult as human beings are but 1 species, compared to 10,000 succulent species.
With that in mind, I will do my best to cover the basics which are at least common in many of the most popular cacti and succulent genera. We will cover 3 main pillars of succulent culture: soil, light exposure, water.
Soil
Each and every grower will develop his or her own potting mix over time, as they learn about the cues their plants exhibit when they need more (or less) water. Since each of our cultivation environments is unique to our location, and our own watering habits, our soil recipes also tend to be unique and all seem to work just fine because plants have a threshold in which they can adapt even to less favorable conditions, as long as they are able to survive those conditions. East Coast Camanchaca soil mixes were made to take the guesswork out of this process, and to give beginner collectors a head-start figuring out their unique soil recipe, by adding organic content to the mix (only if needed) and observing their results. No matter what soil you use, start off with low organic content (around 10%) and use very gritty constituents, to make sure your plants are able to drain fast and roots are able to dry quickly and aerate (breathe).


Light Exposure
Just like with soil, plants can adapt to different light conditions to survive even when these are not the most favorable. Cacti and succulents do well with 8-10 hours of sunlight per day, but that extra 2 hours really makes all the difference. It’s also important to mention that even though some plants like “direct sun” that means they can adapt to it over time as mature plants, so for most plants in cultivation you will want to filter the sunlight about 20-30%. I myself use mosquito net to filter out some sunlight. If you start seeing plants “stretch” and grow thin, this is a sign of inadequate light and said plants should slowly be acclimated to increased exposure.
Water
Finally, we arrive at water, purposely leaving it for last as any advice on watering must first take into account that the 2 pillars above are taken care of. In order to thrive a cactus or succulent must first be potted in the correct soil and second receive the appropriate amount of light exposure (preferably 10 hours). If the first 2 pillars are ignored, even if watered correctly a succulent can succumb to rot since it is not able to absorb and metabolize all of the moisture around its roots in time to dry out before the next watering. If the light and soil are correct, you may water your cacti and succulents roughly once each 14 days (this varies depending on species and age of plant, older plants need less frequency) only when temperatures are higher than 70 Fahrenheit, and you have checked the weather forecast to make sure there are sunny, warm days ahead. I like to start watering very lightly after winter dormancy, and increase the amount of water only after the first couple of watering events of the year, as roots need a little time to get started at first. I never water a freshly potted plant (wait 1-2 weeks), and extremely sensitive plants like Lophophora should not be watered during the first month or two after being potted (the larger the plant the longer you should wait).
Check out the video below on the technique I use to water my plants to avoid any moisture landing on the crowns. I do so because I live in a high humidity environment but also because being submerged fully wets the soil and activates the roots. Some growers will leave their plants submerged a full 12-24 hours for the first watering of the year (after winter), but please do so at your own risk as this must be done with the right soil and weather in order to work. As with all plant cultivation advise, always test one plant first in order to detect any issues before moving on to other plants.